As some of you who follow me on MapHook, Facebook and Twitter know, this last weekend, I decided to convert my sit-down desk, to a standing desk. Many of you asked me to document the process with before & after pictures. I decided to go a step further and show you the whole process.
Rather than spend hundreds of dollars on a brand new standing desk, I decided to keep my existing desk and modify it. I did this for two reasons. First, to save money. Second, because I’m really happy with the surface of my existing desk. If’s a very thick, laminated pressboard desk. Wicked heavy, but very solid. I also liked the “L” shape that I currently had, and paying for a single standing desk seemed like it would be odd to have the different levels of the desk.
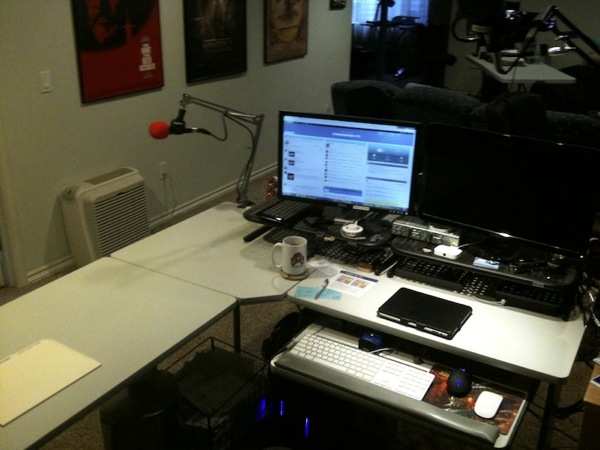
Here’s a picture of my desk as it was before. The red mic is where Tina sits for Musically Challenged.
Our first thought was to simply replace the legs of the desk with new, taller solid pine legs. But on closer inspection of the existing legs, we realized that the existing painted steel legs were “C” shaped, and we decided we could actually cut the legs across with a saws-all, and insert a fitted piece of pine between the two parts.
For the height of the desk, we went with a recommendation from this site. The bottom line is that you want the top of the desk to be at about elbow-height, to reduce the amount of strain on your wrists. I went a little higher, since I use a pull-out keyboard, but still want the surface of the desk to be comfortable for writing and drawing.
As you’re taking everything apart, it really helps to put labels on your cables to help remember where they’re supposed to be plugged in. Especially with my setup, I have audio cables going in every direction for microphones, audio processors, splitters, etc. And trying to remember how everything goes together would have been a nightmare. Fortunately, I had a sheet of labels that I bought many years ago from Cable-Safe that did the trick. The sheet (which came with a whole package of cable organizing tools and a back-of-desk bracket) has color-coded labels that wrap around the cable, as well as same-colored dots that you stick next to the ports where you plug them in, and a “master list” where you can write next to each label.
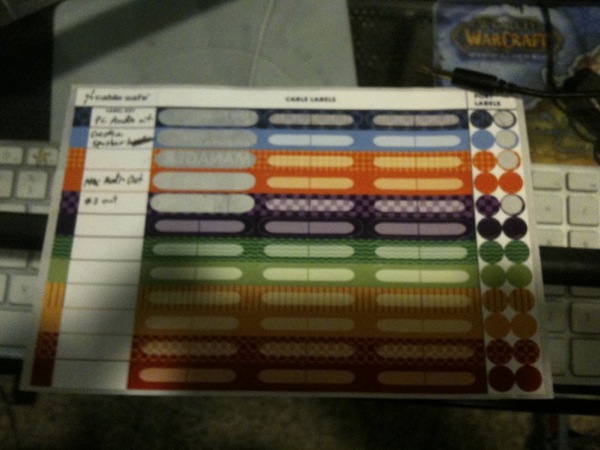
The label sheet form Cable-Safe
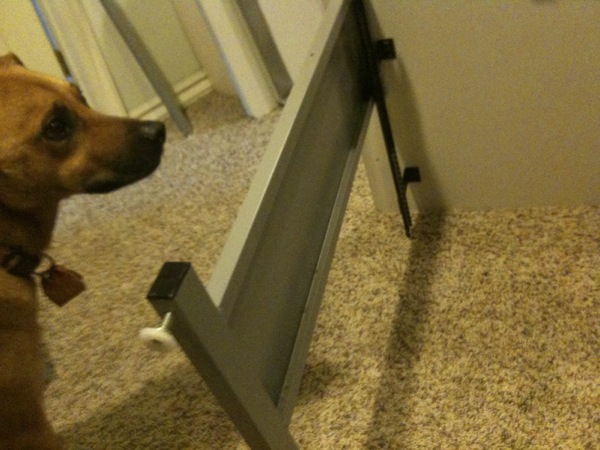
First step was to disassemble the desk. Daisy helped.
This next shot will give you a better idea about the “C” channel in the existing legs.
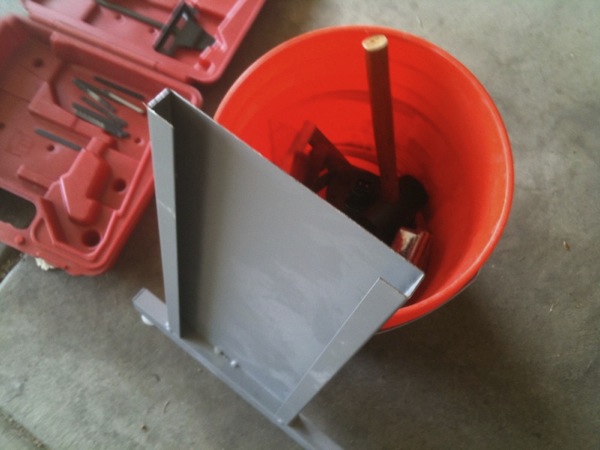
Here’s a piece that’s been cut already, with the “C” channel where we’ll insert our board.
Once all four legs have been cut and filed down, we were able to insert the boards, which had also been cut to fit. We found some solid pine, and painted it white to go with the grey and white colors of my desk. You’ll notice that we’ve also cut a notch into the sides of the board to help keep it more secure in the channel.
I’d recommend using solid pine over pressboard shelving, which would have been a little cheaper. If the desk gets hit from the side, pressboard might increase the possibility of it breaking in half, whereas pine is going to be much sturdier.
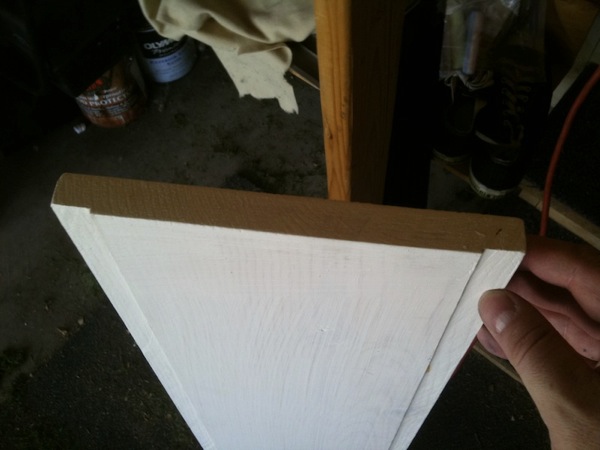
The boards to insert.
After inserting the boards into the legs, we used a couple of self-threading wood screws to hold them in place, and to provide a little bit of extra support.
As I assembled everything back together, I realized that a couple of my cables now wouldn’t reach the new extended distance. NObviously nothing that wasn’t rectified by a quick trip to MicroCenter, but something to keep in mind if you take on a project like this one.
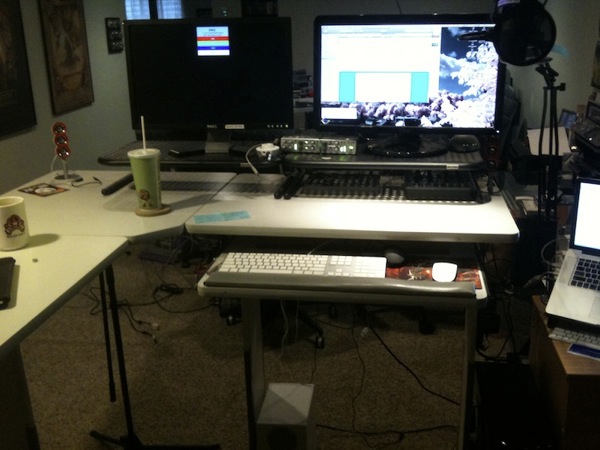
The finished product.
After using the desk for a few days, I definitely feel a tightness in my lower back. No pain, but a firmness that I expect will disappear after a few days. Standing also deepens my voice slightly, as it keeps you from hunching an compressing your diaphragm. We’ll see how it sounds on the next episode of Coverville.
I also have a nice wheeled barstool-height chair that I can use in an emergency, but so far, I haven’t even wanted to sit. There is something about standing that makes me focus more on what I’m working on. I know it’s only been a couple days, but so far, I’m enjoying it.
Sweet! You’re one step ahead of me then. Can’t wait to finagle myself a stand-er-up-er.
Wonderful makeover, and wonderful post. This qualifies for featured workspace on any site that I can think of. Daisy is gorgeous. Do I need to upgrade my cheap subwoofer now that you will be growling standing up, Brian?
Forever the Wedding DJ standing there over his decks…!! 🙂
Interesting project, but please, please don’t tell my bosses I would be more productive standing up all day. I swear it would kill me off, but i can see how working from home like this and doing what you do might be good. Basically to stop yourself sitting there all day.
How about a ‘Standing’-themed episode of coverville?
Covers of “Get Up, Stand Up”, REM’s “Stand”, etc
Stand by Sly & the Family Stone (Jackson 5ive did a cover)
Stand by Me (lots of covers charted)
Stand by My Woman (Lenny Kravitz)
Stand by your man- Lyle Lovett did a cover that appears in The Waiting Game
Stand Tall – Burton Cummings
Standing in the Shadows of Love – Four Tops
Standing on the Corner -Four Lads, Dean Martin, Mills bros
Interesting, Brian! Would love to see a tour of your office 🙂
Oh, and if we’re doing a standing themed show, don’t rule out songs with “Up” in the title, such as Great Big Sea’s When I’m Up, I can’t Get down.
Standing = More focus?
I’m expecting more DPS. 🙂
I’m showing this setup to my wife for her workshop. Thanks.
Grats on the new elivated deskery!
Hey, just a quick note when I worked at Dell we had these elevated desks and such, but we were also given an additional item to stand on. I don’t remember exactly, but it was a special rubber matt that really helped relieve the pressure on your feet from standing in one position while you worked. Hope this helps your back, and enjoy your new disco dancin’ deskery! lol